We will go through the process of setting up Zimbra High Availability (HA) using drbd and pacemaker on Centos 7 in this blog post. The setup process can be divided into multiple steps such as DRBD setup, Zimbra setup & Pacemaker setup.
NOTE: Images used in this post were lost due to bad disk, the images retrived are added without order below instead of inline with content.


DRBD setup
The Distributed Replicated Block Device (DRBD) is a software-based, shared-nothing, replicated storage solution mirroring the content of block devices (hard disks, partitions, logical volumes etc.) between servers. [refer]
Note: The sync line is optical fiber based to reduce any chance of making DRBD as bottleneck.
Create partition for DRBD
Create a new partition which will be dedicated to DRBD on both the nodes. It will be utilized by DRBD delicately. In our case, we will be further mounting virtual partition created by DRBD to /opt in further steps. The partition dedicated to DRBD, say /dev/centos/opt should never be mounted directly.
Install DRBD on Centos 7
Following steps need to be replicated on both nodes.
- Install the EPEL Repository.
rpm -ivh http://www.elrepo.org/elrepo-release-7.0-2.el7.elrepo.noarch.rpm - Import public key.
rpm --import /etc/pki/rpm-gpg/RPM-GPG-KEY-elrepo.org - Install DRBD.
yum -y install drbd84-utils kmod-drbd84 - Load the DRBD module manually.
modprobe drbd - Verify if drbd module is loaded or not.
lsmod | grep drbd

Create DRBD res file
Go to /etc/drbd.d/, and verify that your global_common.confcontains entry similar to include "/etc/drbd.d/*.res";on both servers. If not present add it, so we can create our DRBD resources in seperate files instead of converting global_common.conf into Trash :P.
- Create a new file named
opt_disk.res(or as per your convenience). - Add following configuration into the file.
resource opt_disk
{

    protocol C;

	startup {
		wfc-timeout 30;
		outdated-wfc-timeout 20;
		degr-wfc-timeout 30;
	}

	net {
		cram-hmac-alg sha1;
		shared-secret sync_disk;
	}

	syncer {
		rate 3000M;
		verify-alg sha1;
	}

	on mail1.iiit.ac.in {
		device minor 0;
		disk /dev/centos/opt;
		address 192.168.1.11:7788;
		meta-disk internal;
	}

	on mail2.iiit.ac.in {
		device minor 0;
		disk /dev/centos/opt;
		address 192.168.1.12:7788;
		meta-disk internal;
	}
}
syncer block
Follow the guidelines from DRBD documentation to avoid any possible network issues here. It is generally recommended by them to be 0.3 * available bandwidth. Though for our purpose, we are using dedicated optical fiber line and can increase the limiter to higher value such as 3G (as done above).
device minor
DRBD will create virtual disk present at /dev/drbdX, where X is the device minor number. In the above example, we will get /dev/drbd1created.
address Use the internal IP i.e. provided by optical fiber Ethernet, and NOT 10.x.x.x IP
Keep the *.res file identical on both the servers.
(other options are thought to be fairly straight, and not specific information added).
Initialize metadata storage
This need to be done on both the nodes. drbdadm create-md opt_disk. The output should be something like:
in case of error in above step, else skip If you using disk which has existing data and such scenarios, you will likely get an error i.e. unable to write metadata. For such cases, possible ways out are as follow source:
- extend current LV: lvextend -L 32m some.vg/existing.data
- add new LV for use as DRBD meta data store lvcreate -n existing.data-md -L some.vg -L 32m
- leave the LV as is, but shrink (or recreate smaller) the existing file system. as you live on LV already, this is NOT recommended. both LV related methods are much more convenient.
Start DRBD daemon
systemctl start drbdsystemctl enable drbd- Finally, start the device using:
drbdadm up opt_disk
Check if the DRBD has been successfully started or not using cat /proc/drbd. The output should be something like:
Please note that both are Secondary and Inconsistent state initially. Also, if by any chance you are not seeing other disk connected or Unknown, then check if both can ping to each other, and if yes, it is likely be due to firewall, i.e. add following to iptables rule.
-A INPUT -p tcp -m state --state NEW -m tcp --dport 7788 -j ACCEPT
Finally sync
If you are able to view as in screenshot above. Go to any one of node and make it primary, thus allowing to sync both of the nodes, using command:
drbdadm -- --overwrite-data-of-peer primary opt_disk
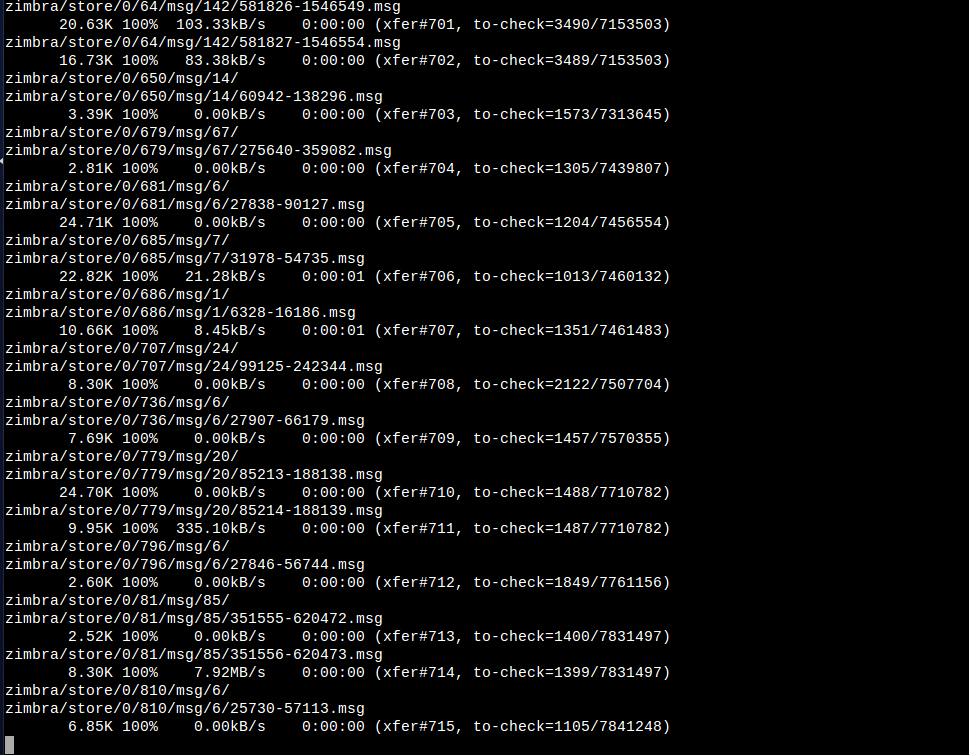
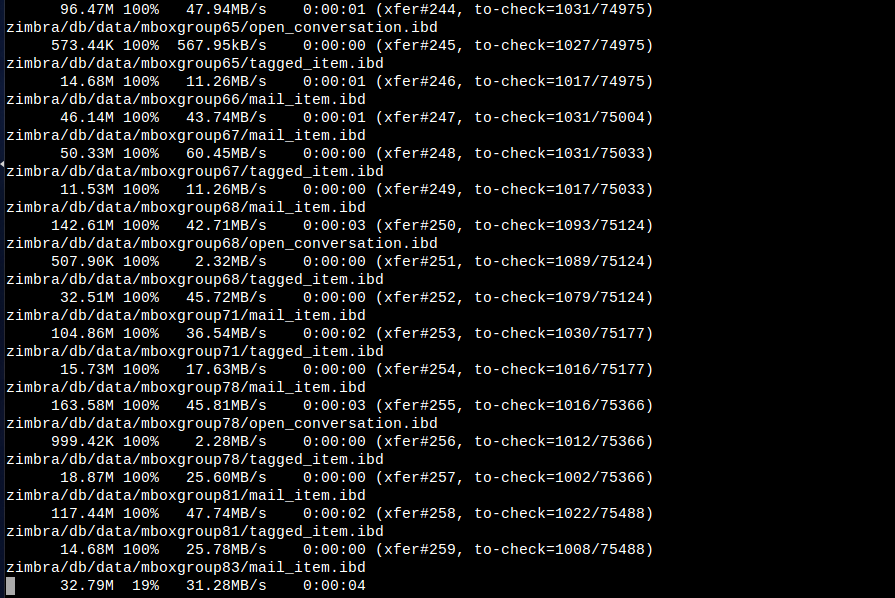
Following which, the sync will start as shown in this screenshot. Go out, have some fun, and come back after sometime.
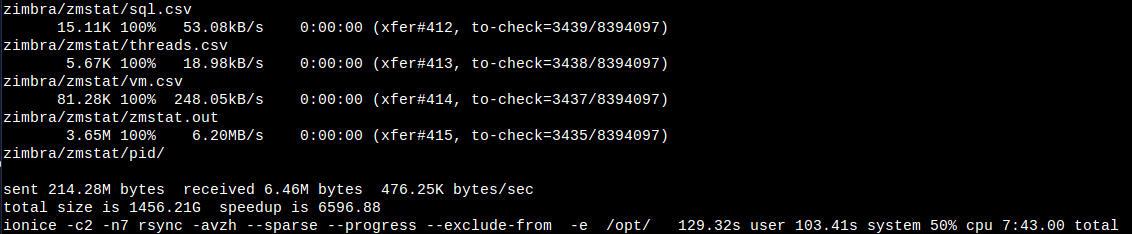
Upon completion, this should be the scenario.
Pacemaker setup
Install DRBD on Centos 7
The pacemaker & pcs packages need to be installed on both nodes.
yum install pacemaker pcs
- Create file
/etc/corosync/corosync.confwith following content. Don t forget to add records for mail1 & mail2 in/etc/hosts.
totem {
    version: 2
    secauth: off
    cluster_name: mail_iiit
    transport: udpu
}

nodelist {
    node {
        ring0_addr: mail1
        name: mail1
        nodeid: 1
    }

    node {
        ring0_addr: mail2
        name: mail2
        nodeid: 2
    }
}

quorum {
    provider: corosync_votequorum
    two_node: 1
    wait_for_all: 1
    last_man_standing: 1
    auto_tie_breaker: 0
}

logging {
    to_logfile: yes
    logfile: /var/log/cluster/corosync.log
    to_syslog: yes
}
- Enable and start
corosync,pcsd&pacemakerone after other.
systemctl start corosync
systemctl enable pacemaker
systemctl start pacemaker
systemctl enable pcsd
systemctl start pcsd
- Check
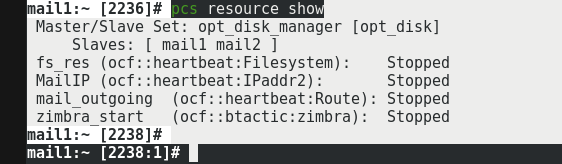
pcs status, the output should be something like shown below. - Allow pacemaker in firewall of both nodes refer.
firewall-cmd --permanent --add-service=high-availability
firewall-cmd --add-service=high-availability
Change pacemaker config
Update following variables for pacemaker.
pcs property set stonith-enabled=false
pcs property set no-quorum-policy=ignore
pcs resource defaults migration-threshold=1
The migration threshold need to discussed and changed as per the need. Currently 1 has been set for quick switch over.
Change hacluster user's password
Both nodes need to authentication with each other via password/key, for our purpose it being on internal network, password based authentication is applied. (which can be changed in future if needed).
- Generate some good password.
</dev/urandom tr -dc '12345!@#$%qwertQWERTasdfgASDFGzxcvbZXCVB' | head -c40; echo ''. Our password:as_if_i_will_share - Change password of hacluster
passwd hacluster. - Authenticate both nodes with each other using
pcs cluster auth mail1 mail2on both servers. Keep username ashaclusterand password from above step.
PCS Resources Needed
Description
| Resource Name | Type | Description | Command |
|---|---|---|---|
| opt_disk | ocf:linbit:drbd | DRBD Resource defination | pcs resource create opt_disk ocf:linbit:drbd params drbd_resource=optdisk op monitor interval=25s role=Master op monitor interval=35s role=Slave |
| opt_disk_manager | multi-state resource | Configure opt_disk as master/slave configuration, leading to 2 active nodes and 1 master node i.e. Primary in terms of DRBD terminology | pcs resource master opt_disk_manager opt_disk master-max=1 master-node-max=1 clone-max=2 clone-node-max=1 notify=true target-role=Master |
| fs_res | ocf |
Mount the DRBD as /opt | pcs resource create fs_res ocf:heartbeat:Filesystem params device=/dev/drbd0 directory=/opt fstype=ext4 options=noatime |
| MailIP | ocf |
Floating IP address assignment | pcs resource create MailIP ocf:heartbeat:IPaddr2 ip=10.4.20.107 cidr_netmask=20 nic=eth0 op monitor interval=10s |
| zimbra_start | ocf::btactic:zimbra | Starting Zimbra services | pcs resource create zimbra_start ocf:btactic:zimbra op monitor interval=120s |
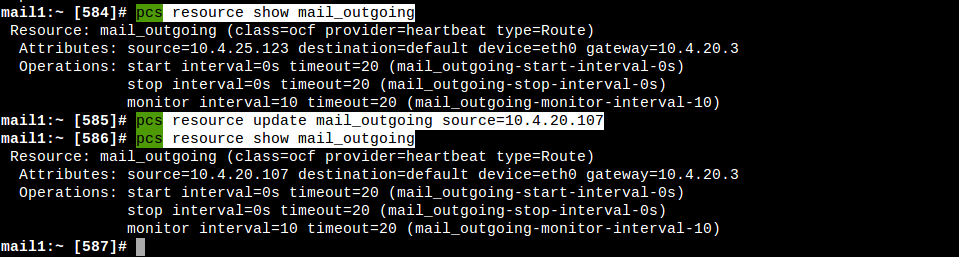
| mail_outgoing | ocf |
Updated outgoing SRC in routes | pcs resource create mail_outgoing ocf:heartbeat:IPsrcaddr ipaddress=10.4.20.107 op monitor interval=10 timeout=20 |
Points to remember:
- Keep different monitor interval for Master and Slave on opt_disk else bad things can happen.
-
master-max=1defines maximum number of resources which can run in promoted mode.ocf:linbit:drbdhas promote function for making resource as primary. -
clone-max=2defines maximum number of resources which can run at given time. As we need total 2 resource i.e. one in primary and other in secondary, this parameter has been kept as 2. -
clone-node-maxandmaster-node-maxtells number of resource which can run on same node. As we need to run it once of each server, it is equal to 1. - fs_res has can several mount options according to your need, for our setup we used noatime (in hope to have lower split-brains).
- Do provide
nicandcidr_netmaskdepending on the network/server setup in MailIP (probably name it accordingly too :P ). -
ocf::btactic:zimbradon t come bundled with standard pacemaker installation, you need to download from Github or Mirror and place at/usr/lib/ocf/resource.d/btactic(create folder wherever needed). - mail_outgoing (or whatever you name) will have IP address equivalent to IP you wish to have for outgoing emails from. Keep it according to the DNS entries and/or generally equal to the floating IP.
Ordering and Colocation Constraints
We need to run DRBD on both the servers, and all other resources only on the server running DRBD in promoted/master state. This is called colocation of resources, i.e. which with which. While we also wish to start zimbra services to start after the DRBD disk is mounted on particular node, similarly change the outgoing route, only when the node obtains the floating IP. These constraints are called ordering constraints in pacemaker terminology. Here is the screenshot of the constraints we need for our setup.
Ordering explained
- Mount the DRBD disk, only when the node has promoted DRBD disk i.e. it is Master.
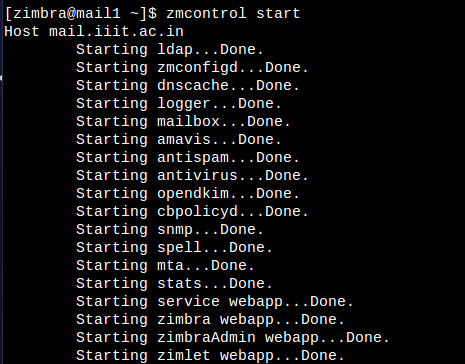
- Once the disk is mounted, start the Zimbra services on the node.
- Once the disk is mounted and DRBD disk is available as Primary, then also take the floating IP to itself.
- On taking the floating IP, change the outgoing SRC in routing table.
Colocation explained
- Mount the disk only where DRBD resource is running and rsc-role is Master i.e. running in promoted state.
- Keep outgoing IP with resource which has disk mounted.
- Start zimbra service and change routing table with MailIP allocation.
Commands for the above:
## For ordering
pcs constraint order promote opt_disk_manager then start fs_res kind=Mandatory target-role=Master
pcs constraint order start fs_res then start zimbra_start kind=Mandatory
pcs constraint order start fs_res then start MailIP kind=Mandatory
pcs constraint order promote opt_disk_manager then start MailIP kind=Mandatory
pcs constraint order start MailIP then start mail_outgoing kind=Mandatory

## For colocation
pcs constraint colocation add fs_res with opt_disk_manager INFINITY rsc-role=Master
pcs constraint colocation add mail_outgoing with MailIP INFINITY
pcs constraint colocation add zimbra_start with MailIP INFINITY
pcs constraint colocation add MailIP with fs_res INFINITY
Other key points
1. Set static route for internal SSH
If you have already read above, you might be aware that we are playing with default route of the node, but many a times if things don t work for the pacemaker, it unfortunately deleted default route from routing table some times. So that s a little concern, so just to avoid such scenerio, lets add default route for intranet in /etc/sysconfig/network-scripts/route-eth0 as:
10.0.0.0/8 via 10.4.20.1 dev eth0
2. Setup fencing on DRBD
There are high chances of reaching nodes into Dunns Law of Information scenario where Bad things will happen. So make sure you fence the resources well. Fortunately, we have only one such resource i.e. DRBD, which need to be fenced, and even more fortunately it has inbuilt capability to do so. Following changes need to be made to do so:
resource optdisk {
  disk {
    fencing resource-only;
    ...
  }
  handlers {
    fence-peer "/usr/lib/drbd/crm-fence-peer.sh";
    after-resync-target "/usr/lib/drbd/crm-unfence-peer.sh";
    ...
  }
  ...
}
3. Speed up the DRBD system
resource optdisk
{
    ...

    net {
        max-buffers 32k;
        max-epoch-size 16k;
        sndbuf-size 2048k;
        rcvbuf-size 2048k;
        unplug-watermark 16;
        ...
    }

    disk {
        ...
        on-io-error detach;
        al-extents 8k;
        c-fill-target 18M;
        c-max-rate   740M;
        c-plan-ahead    0;
        c-min-rate     4M;
    }

    syncer {
        rate 3000M;
        verify-alg md5;
    }
    ...
}
Above configuration was used to increase speed from 50M/s to ~500M/s.
4. Setup auto split-brain recovery
There are 3 types of split brain possible which are as follows:
- Secondary/Unknown & Unknown/Secondary None of the node has claimed to be primary. Under such scenario, we can simply discard the claim of node which has zero changes, and let the other become primary.
- Primary/Unknown & Unknown/Secondary Try to see if any node has zero changes, and if yes, follow as above, else disconnect.
- Primary/Unknown & Unknown/Primary First of all, lets sit and pray this should never happen. If yes, simply DISCONNECT. Then sit down and solve the split-brain (nightmare!).
resource optdisk
{
    ...
    net {
        ...
        after-sb-0pri discard-zero-changes;
        after-sb-1pri consensus;
        after-sb-2pri disconnect;
    }
    ...
}
Though after fencing the last point should never occur, but even if it occur this is the only way possible out as per current knowledge on this topic.
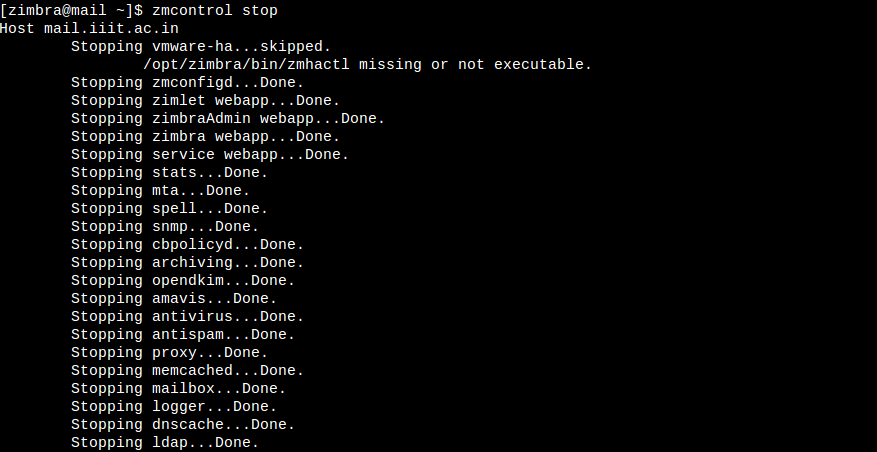
- Close pacemaker & zimbra
- Disconnecting both DRBD
- Promoting to Primary on both, and mounting
- Manual file merge / rsync
- In case of mariaDB, manual copy past of entries
- ...
- Once they are on same condition, connecting DRBD back
5. Anything not working??
Sit down and relax, and blame selinux. Disable it, and try (and then enable back after generating policy)!!
Failing even now? Google it! ¯\(ツ)/¯
Bye bye!! 👋👋